The post Achieve Perfect Color with the Best Monitor Calibration appeared first on thegreatillusion.com.
]]>Monitor Calibration: Learning How to Make the Most of Your Display
Are you looking to get the most out of your display? Whether it’s for work, gaming, or just everyday use, having a properly calibrated monitor is essential for achieving optimal image quality. With the right strategies and techniques, you can make sure that you’re getting the best performance from your screen. In this guide, we’ll cover the basics of monitor calibration and offer tips and tricks for making sure that your display looks its best.
The Best Monitor Calibration for Professional Image Quality
Monitor calibration is essential for getting the best color accuracy and image quality out of your display. For professionals in the field of graphic design, photography, video editing or any other profession requiring accurate color rendering, monitor calibration is an essential process that can help you achieve the highest level of image quality.
Calibrating your monitor involves using a software program or hardware device to set the color space, luminance, and color temperature of your display. By carefully adjusting the settings, you can ensure that your monitor displays colors accurately and consistently from one image to the next.
If you are looking to get the best possible calibration for your monitor, you should consider investing in a hardware device. These devices can often be more precise than software programs, and they can often provide the highest level of accuracy and color consistency.
Additionally, it is important to note that regular monitor maintenance is also essential. In particular, you should regularly use a display cleaner to prevent dust and other contaminants from dulling or distorting the image quality of your display.
Overall, monitor calibration is an important way to ensure that your images look their best and provide the highest level of accuracy and color reproduction. By investing in the right hardware and following a regular maintenance routine, you can ensure that your display will always look its best and provide you with the best viewing experience.
The Ultimate Guide to Monitor Calibration: Achieving Accurate and Consistent Color Reproduction
Monitor calibration is an important step for any photographer or digital artist. It ensures that the colors you see on your computer monitor accurately represent what will be seen when the photos or artwork is printed. Through proper monitor calibration, photographers and digital artists can achieve accurate and consistent color reproduction. By calibrating a monitor, you can make sure that what you view on the screen is an accurate representation of what the final image or art will look like. This ensures that the colors you have chosen and achieved will be consistent across all mediums. Monitor calibration is also essential for avoiding color banding, color casts, and other issues that could affect the image quality or the success of a project. With the right monitor calibration, photographers and digital artists can be sure that their images are color accurate and will look as intended, no matter what type of medium they will be viewed on.
Monitor Calibration: Finding the Best Setting for Your Needs
Conclusion: Finding the best monitor calibration setting can make a dramatic improvement to your viewing experience. With the right calibration, you can improve color accuracy and contrast, as well as reduce eye strain. However, there is no single “best” setting, as the optimal settings can depend on the type of work you are doing and the features of your monitor. Taking the time to experiment and find the calibration that works best for you can help you get the most out of your monitor and make your viewing experience the best it can be.
The post Achieve Perfect Color with the Best Monitor Calibration appeared first on thegreatillusion.com.
]]>The post How Car Colors Impact Your Risk of an Accident appeared first on thegreatillusion.com.
]]>The color of your car may not be something you think about when you’re on the road, but it could be having a greater impact than you realize on your risk for an accident. Many factors play a role in driving safety and being aware of how car colors can influence them is a great way to stay safe. In this article, we’ll discuss the various factors that contribute to car color-related accident risk and provide helpful tips for staying safe on the road.
Does Color Really Affect My Chances?
Every day, thousands of drivers face risks while they are behind the wheel; however, some are more affected by certain risks depending on their vehicle color or other external factors. While there is no definitive answer as to whether or not car colors directly impact your chances of getting into an accident, there are several things to consider when it comes to visibility and safety overall:
Visibility Is Key
It stands to reason that more visible cars will have less chance of getting into an accident. Darker colored cars tend to blend in with the background and can be hard to distinguish; this makes them more likely targets for other drivers who may not see them. On the other hand, brighter-colored cars are much easier to spot, which could help reduce the risk of getting into an accident.
Hot Colors Make You More Visible?
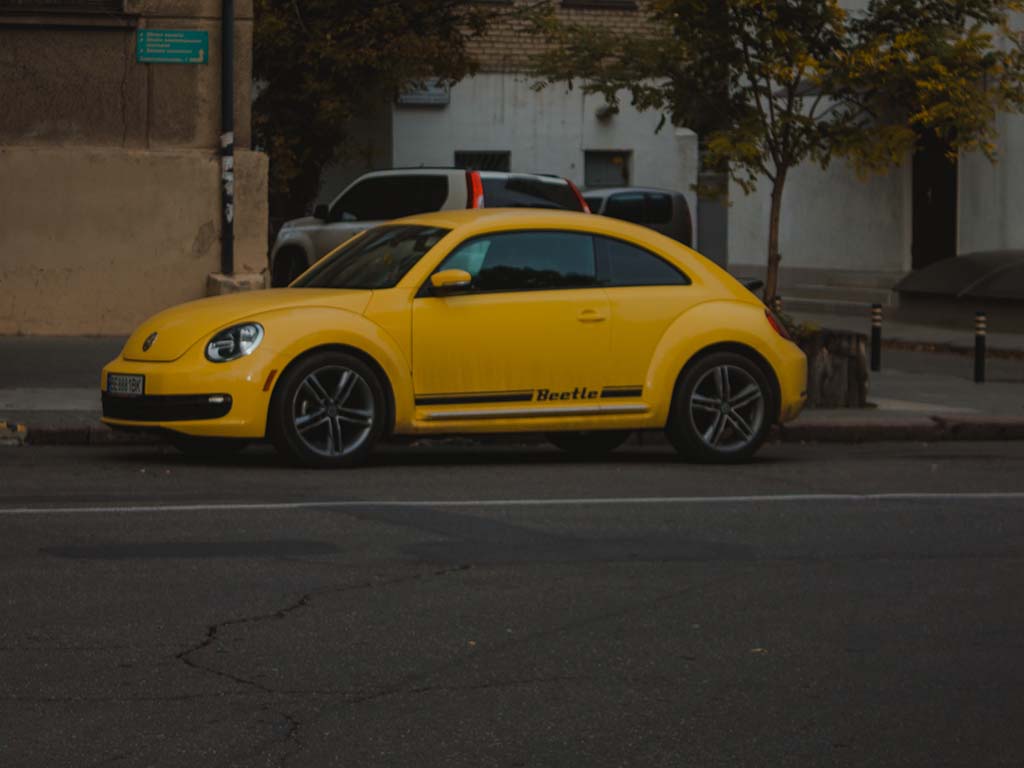
Studies have shown that certain car colors may be more visible than others, making them less likely to be involved in accidents. Red, white and yellow cars are generally considered the most visible and least likely to get into accidents. Additionally, studies suggest that loud colors such as bright yellows or oranges may actually make you more visible on the road than pastel shades like baby blue or light green.
What Other Factors Could Contribute to My Risk?
While car color is one factor that can influence your chances of getting into an accident, it is important to consider a variety of other factors when it comes to safety on the road:
Age & Gender Considerations
Drivers who are younger and male tend to be at higher risk for getting into an accident due to their inexperience as well as their tendency toward aggressive driving behaviors. Additionally, older drivers may have slower reflexes, which can make it harder for them to react in time to avoid an accident.
Vehicle & Roadway Safety Features
The type and condition of your vehicle can also play a role in accident risk. Vehicles with more advanced safety features are usually less likely to be involved in an accident than older vehicles without these features. Additionally, roads with poor visibility or hazards like potholes and sharp turns can increase the likelihood of getting into an accident.
Driver Responsibilities & Behaviors
The most important factor when it comes to driving safety is the driver themselves; no matter how bright the color of your car is or what safety features it has, if you don’t practice safe behaviors on the road then you will always be at risk for an accident. Some key responsibilities that all drivers should practice include following traffic laws, staying alert and avoiding distractions while driving, maintaining a safe following distance, and being aware of potential hazards on the road such as construction areas or bad weather conditions. Also read about best muffler for 4 cylinder.
Tips for Staying Safe on the Road
There are several things you can do to reduce your chances of getting into an accident on the road, regardless of the color of your car. Here are some helpful tips for staying safe:
• Always obey traffic laws and drive defensively
• Be aware of your surroundings, including pedestrians, animals, and other vehicles
• Make sure to maintain a safe following distance between you and other vehicles
• Avoid distractions such as cell phones or eating while driving
• Inspect your vehicle regularly to ensure it is in proper working order
• Keep an eye out for potential hazards such as potholes or debris on the road
• If possible, opt for a brightly colored car that will make you more visible on the road.
By following these tips and being aware of how car colors can influence your chances of getting into an accident, you can stay safer on the road.
Ultimately, no matter what color your car is, it’s important to practice safe driving behaviors and be aware of potential hazards on the road. While car colors may play a role in visibility and overall accident risk, they are not the only factors to consider when assessing your chances of getting into an accident. By following the tips outlined above and staying alert while behind the wheel, you can reduce your chances of getting into an accident regardless of what color car you are driving.
The post How Car Colors Impact Your Risk of an Accident appeared first on thegreatillusion.com.
]]>The post 9 Tips on How to Deal with Anxiety at Work appeared first on thegreatillusion.com.
]]>Unfortunately, people tend to ignore their anxiety at work until the only way out is a resignation letter. Linkedin resume writers who are working for https://resumeservice24.com/linkedin-writing-service, however, have a few tips to share that can prevent such a scenario. Even though the world requires you to be proactive and multitask all the time, you still need to think of your health and your future.
Don’t Limit Yourself and Don’t Change Your Lifestyle
After getting employed, people often tend to work longer hours and do more for their employer as if they were trying to prove something. That only adds pressure to the already stressful transition period.
It’s important that you keep your routine and work-life balance as close to the way they were before as possible. Attend courses or places that you are used to attending, spend your time with family and friends. Don’t limit yourself because it’s actually a lack of communication that makes you feel anxious.
Accept The Fact That You Have a Problem
Don’t ignore it if you feel that something goes wrong. Suppressing your feelings won’t help. On the contrary, give it some time and try to figure out the reason behind your anxiety. If it’s caused by new work experience and environment, try to communicate your way out of this. Hang out with your new colleagues to finally feel at ease with them.
If the problem doesn’t go away, it means you should focus more on what causes it. It’s not something that has recently emerged. If so, it requires greater attention.
Focus on Your Well-Being
The only person who is responsible for your health and comfort is you. That’s why you need to be mindful. Examine symptoms that make you concerned, record and study them. If you notice that your well-being is under a threat, take action as fast as you can.
Work is indeed a very important aspect of our lives. But no one will ever succeed at their job if they neglect their health and balance. Thus, to lessen your anxiety levels, start by treating your mind and body as sacred.
Have Enough Sleep and Rest
Building a career is exciting. However, it is also emotionally draining. You have to compete with dozens of people who are as good as you are or sometimes even better. You have to prove your worth to recruiters, employers, and managers. Of course, all of it uses your inner resources unlimitedly.
To recover your energy and beat anxiety, have a proper rest when you need it and always get enough sleep. Creativity only comes to those who balance duties and self-care.
Don’t Act Irrationally
You must have known a few people who’ve been going through depression, anxiety, and other psychological problems. You must have seen how hard it was to drag them out from this condition no matter how smart and reasonable people they were.
Thus, if you feel that something bothers you for longer than it normally does, don’t panic but take your time to study the problem. Don’t overthink and don’t take any action that you’d find risky or questionable in any other circumstances. The first idea that comes to mind at this time might not always be the best one.
Try Meditation and Breathing Practices
In many cases, anxiety can be easily dealt with if meditation is involved. What previously was associated with religious practices now has been officially backed by scientists as a mechanism helping people handle mental health issues and get back to normal.
There are lots of meditation techniques available in apps and on YouTube that you can try for free. If you want to act more decisively, you can try meditation groups and practice relaxation collectively. It really helps to deal with anxiety.
Quit Caffeine
If you are feeling anxious, give up drinking your favorite latte in the morning. Caffeine does not bring any good to your health but increases your heart rate and intensifies anxiety.
Instead, drink herbal tea or temporarily replace coffee with whatever drink you like the most except for Coke. For example, lemonades or fresh juices are a lot better choices to start your morning with.
Communicate With Family Or Friends
Communication is critical. We are social creatures, and we depend on interactions with other people. Quite often it’s a lack of them that causes depression and anxiety. Other individuals often help us feel needed, recognized, praised and admired. And those feelings help us deal with mental challenges.

Call your friends and family, go see them on weekends, and communicate – the more the better. It not only boosts your confidence and handles anxiety issues but also helps work out your key skills.
Get Professional Help
Therapy should not be surrounded by stigma. On the contrary, it proves that you are a grown-up individual who cares about their mental and physical health. Professionals can help you leave anxiety far behind even if it requires dramatic changes.
For example, individuals experiencing burnout won’t get rid of it if they don’t change their work. At the same time, a career change might be a good thing if a current job is tiresome. Moreover, building a personal brand, crafting a winning resume, and getting more interviews may boost your confidence and help you forget about anxiety at all.
Final Words
The world has entered a stage when business and working overtime are the new normal. It affects people significantly, often leaving them on the edge. Such a lifestyle causes lots of mental challenges that people have to cope with.
The right way out of this is to slow down and find some time to renew your depleted inner resources. Otherwise, you risk losing it at any moment, getting buried by depression and anxiety.
The post 9 Tips on How to Deal with Anxiety at Work appeared first on thegreatillusion.com.
]]>The post How to Make Realistic Miniature with Help of Computer Technologies appeared first on thegreatillusion.com.
]]>Stages of Modeling
- Work on the miniature begins long before its appearance becomes clear. First of all, the characteristics and description are described in order to make the model fit harmoniously into the squad.
- Next, a sketch is created.
- When the approximate appearance of the character becomes clear, he is given a certain pose. Next, the character is modeled “clean”. This is probably the most difficult and painstaking part of the work.
- At this stage, it is necessary to immediately think about how the model will be cut into pieces. If you set up for this right away, further cutting will not be a big problem, otherwise, prepare the model for printing can be torture. Here I should point out that for different printers, some conditions in the preparation of the model are different.
- After cutting the model is sent to print. I want to say right away that the scale of miniatures is very small, the miniature height is only 35mm.
- After printing, the model must be reproduced, and this is done by casting liquid plastic in a silicone mold. Molding is also a process that requires skill. There are usually several parts in a figure and it is not always possible to estimate at once how best to arrange them in relation to the sprue. In some models, different parts have to be placed in different molds. Such a decision may be due to both the total number of parts and their configuration. Experience has shown that the larger the mold, the more demanding the configuration of the sprue.

Important Points
- In addition, the mold has no reservoir where the plastic is poured. It has to be built up with improvised means. You will need time and material to figure out which mold configuration is best.
- Then the actual molding process takes place. An expensive quality plastic called Smooth-Cast is used. Despite the promise of the foundry plastic’s creators that it does not require vacuum equipment, it is still necessary. Without it, a large percentage of castings come out with small defects in the form of bubbles. A homemade vacuum chamber is used for degassing.
- After casting, the sprues are neatly bitten off and the figurine is practically finished. The recipient will only have to glue it with the best glue for styrofoam to his liking (included with some figures are different combinations of equipment) and set it on a stand that can be left as is or to be creative and artistically decorated.
- And of course, any miniature is finished after painting.
3D Printing Technologies
3D printing offers mankind fundamentally new opportunities, all thanks to a wide pool of technologies that are constantly being improved. Today there are already more than ten 3D Printing Technologies for Miniatures, and I am sure that the flight of inquisitive engineering thought will not stop there. For now, let’s briefly review the key features of the 3D prototyping methods at our disposal.

DMLS – Direct Laser Sintering
This method was developed by the well-known Munich-based company EOS and is used for metal fabrication. Already familiar to us the file in the format STL before the start of printing is divided into drawings, each of them – one of the layers created during the construction of the model. Metal powder sintering is provided by sufficiently powerful fiber lasers. A small amount of metal is fed into the build chamber and flattened with a special roller. The laser head moves along the contours set in the drawing and sinter the fresh powder according to the contour of the future product, and so on until you have the finished object in front of you. The main beauty of this technology is the high precision, with layer thicknesses up to 20 microns.
DLP – Digital LED Printing
Today this relatively young technology is considered one of the worthiest alternatives to laser stereolithography – it is also based on the processing of photopolymer resins, which allows for remarkable accuracy in prototyping. Instead of lasers, DLP printers use LED light projectors, forming not only the outline of the future model but the entire layer. DLP technology is in demand in digital dentistry, production of souvenirs, in the field of free design and jewelry, 3D printers working in it are gradually replacing the SLA equipment. The advantages include excellent accuracy (up to 15 microns), a wide range of mechanical and physical-chemical characteristics of photopolymer resins, and a large selection of color solutions.
LOM – Three-Dimensional Lamination
This method was developed by the world-famous 3D company Helisys Inc. and belongs to the rapid prototyping technology. Its essence – in successive layers of gluing film or sheet materials (metal foil, plastic, and even paper). The contour of each new layer is determined by the laser cutting parameters. The printing process is as follows: the first layer of material with a previously applied adhesive layer is placed on the working platform, the laser outlines the contour of the future product, the excess material is cut off, the platform with the finished layer is shifted down, a new sheet is fed into the chamber. Of course, the resolution is inferior to stereolithography or selective laser sintering, but three-dimensional lamination allows the production of dense and large products that respond well to post-processing. The peculiarities of LOM include the need for post-processing of the finished object, as well as the fact that the thickness of the layer depends on the selected production material. This is the most accessible and inexpensive method of 3D prototyping due to the low cost of consumables.
That’s It!
You can print many different things with a 3D printer. Does your child want a new toy? Print it! Especially, sometimes the simplest items are not on sale. For example – rack mounts, gears for kitchen appliances, coasters of the required size and design. The technology is already quite mature and the quality of 3D printed items is constantly improving. It’s easy to imagine a near-future where everyone has a 3D printer in their home. So I hope that this article was useful for you.
The post How to Make Realistic Miniature with Help of Computer Technologies appeared first on thegreatillusion.com.
]]>The post How to use real miniatures and Photoshop to create dreamy images appeared first on thegreatillusion.com.
]]>For the work of printers, designers, photographers, cartoonists, architects, and other creative professions, it is important to have a complete set of tools for correcting multimedia files. Photoshop is an extraordinary editor in which you can not only correct and retouch images, but also transform shapes, save GIF animations, use layers and effects. These features make it easy to transform, clone, enhance images, and apply various filters to create colorful, sellable pictures.
The Main Features of Photoshop
The licensed version of Photoshop is equipped with a large number of features for creating high-quality images:
- improving the quality of scanned, printed images, eliminating color defects during shooting;
- creating a multi-layered image with the ability to edit each individual image to convey color depth, working with complex graphics;
- assembling photographs and pictures, individual elements into collages;
- restoring old pictures, photo retouching;
- working with sketches and drawings;
- wide choice of tools for processing text elements (fonts, effects, filters);
- 2D and 3D model processing, adding textures, working with shapes;
- creation of interesting graphic elements for printing, design, site design, and so on;
- preparation for printing on the printer or the Internet and instantaneous publication of files;
- working with standard formats for bitmap and vector images;
- coloring of black and white files.

Advantages of Photoshop For High-Quality Retouching
Photoshop is the main tool of computer graphics, which is used for all kinds of the commercial processing of media files. The essence of Photoshop is to correct an image, to improve its perception, to give photos and videos clarity and harmony. This program allows you to enhance the effect of the picture, to create complex and beautiful designs from simple elements.
Why You Should Use Photoshop:
- Supports all major media file formats and tools for editing them.
- Has full functionality for correcting and creating pictures.
- Supports the full operation of graphics tablets.
- Can be expanded with plugins.
- There is a free version, but for professional use, we recommend buying a licensed Photoshop key.
How to Edit in Photoshop
The “Edit” tab displays the basic actions that can be performed on a file, not including targeted work with colors, layers, and filters in the image. For example, you can apply copy, cut, and paste functions for editing. The editor can spell-check text, fill, or stroke. From this toolbar, you can make color adjustments to images, import or export libraries of fonts, brushes, and filters. All the tools for transforming photos are available: rotate, flip, zoom, and perspective. You can also customize the top menu of the tools for convenient work with the program.
How to Process A Photo in Photoshop
Processing images in a graphic editor is quite a complicated task if you don’t know what tools to use. Photoshop provides many photo processing options, both with filters and brushes, as well as with the usual functions. If you need to crop any part of the image, you can use the selection and crop tools on the taskbar. You can change the size of an image, not only by applying to zoom but also by changing the size in pixels inches or centimeters yourself. To work with the web, you can initially set “Units” in the main settings.

Getting Started with An Image
To find out more about what the program can do, first open the picture you want to edit. Select “File” in the top menu, then “Open” and the desired image. Once it’s in the program window, you can start editing.
You will see that a new menu with several tabs appears to the right of the picture. The most important one is called “Layers” where all your actions on the image are carried out. In order to start working, you have to unlock it, since by default the image is kind of in the background. To do this, you double-click on the image and the “Background” caption in the “Layers” tab. Done – now your picture is a layer.
Working with Layers
Layers are the foundation of working with Photoshop. What are they for? – anyone who is starting to learn the basics of the program will ask you this question. The layers have a lot of functions, and only with their help, you can create complex, original, and professional work.
For example, you have made an unfortunate action with an image or an area of effect application. In that case, layers can serve as a kind of insurance by using the “Create Layer Duplicate” function. If you want to diversify the picture with additional inserts, to make an inscription or a drawing, you can create a new layer that will be located above the main one, activate it, and start working: attach new pictures or create your own drawing with a brush and pencil. Layers have their own transparency, which can be adjusted to full or semi-transparent.
That’s It!
Mastering such a popular program is useful for people of all kinds of professions and hobbies: Photoshop can be used for photography, for design, and simply for personal purposes, making your photos more beautiful and of higher quality. Working in Photoshop is a creative process in which everyone will find something interesting. So I hope this article was useful and you found out for yourself how to make cool photos using miniatures.
The post How to use real miniatures and Photoshop to create dreamy images appeared first on thegreatillusion.com.
]]>The post The best tools for downloading appeared first on thegreatillusion.com.
]]>
USDownloader
USDownloader is a handy program that specializes in downloading files. We mean automatic downloading, which involves such file hosting services as FileBox, Megauplоad, SendSpace, FileFactory, Rapidshare, and more. Various video hosting services are also included in the list (YouTube, RuTube, Vimeo, and other sites of this type).
USDownloader is a very simple tool; even a beginner would easily cope with it. Let’s figure out how to use it:
- Copy the link to a file you want to download.
- Paste the link into the corresponding field of the manager.
- Select the location where you want to save this object.
- The app picks up the link or links automatically.
- After clicking on the “Start” button, the download of files starts immediately.
Everything is simple, as you can see. In addition, pay attention to the fact that you have the opportunity to independently form a queue for downloading at your discretion.
Another great feature is that downloading starts, pauses and stops on a schedule. The main features of the program are the following:
- Intuitive user interface.
- Ability to get a file without entering a captcha and waiting for a direct link.
- Integration into popular browsers, including Firefox, Opera, Internet Explorer.
- It is possible to work through HTTP and FTP proxy servers.
- Support for about 120 file hosting services.
- Regular app updates.
- It is possible to resume if the connection is broken.
- The files that are on the servers will be downloaded automatically.
Free Download Manager
This is open-source software that performs several roles. Those are the download manager, accelerator, task scheduler, manager, and website viewer.
The utility is distributed under a free license. In addition, it is worth mentioning another advantage that Free Download Manager has – automatic download resumption.
Let’s talk about the peculiarities of this tool.
- The BitTorrent protocol is used.
- You can download flv videos from plenty of sites, not just from YouTube.
- Offline browser.
- ZIP archives can be partially downloaded.
- Converting FLV files to popular formats.
- Preview or listening to files until the download process is complete.
- Metalink support.
- Sending files to other users.
- High speed of work due to the division of files into several sections and simultaneous download.
- The ability to split the downloaded files by type and save them in specific folders.
- Automatic mode for specific tasks: start, stop, resume, and other actions.

VideoHunter
VideoHunter is another nice solution worth your attention. It is suitable for both converting and downloading, which is a huge plus. It is also possible to download videos of the highest quality.
This tool makes it possible to easily get videos from both streaming sites and social networks, so your options are numerous. Videos of any resolution can be downloaded, for example, 2K, 4K, 8K. Moreover, simultaneous downloading of several files (even if they are from different sites) is also supported. Those who need subtitles will also be satisfied: they can be downloaded in SRT format.
Conclusion
So, nowadays plenty of options for downloading videos of good quality are available. Many people need to download videos for different purposes, so you can choose either downloadable solutions or online tools. Both operate fine; the choice depends on what tasks need to be solved, for example, how many videos you need daily, etc. So choose what suits you more and good luck!
The post The best tools for downloading appeared first on thegreatillusion.com.
]]>The post Choosing a monitor appeared first on thegreatillusion.com.
]]>
High-quality monitors are needed
Investment in monitors of high quality is a great decision for a number of reasons. Let’s have a look at them.
First comes the increased comfort of work – the monitor with sufficient resolution and high frequency of updating is the decision providing the comfort of use. Such decisions as adjustment of height and a tilt angle, also improve ergonomics and comfort of work at a table that affects work efficiency.
Moreover, with a good monitor, there will be no fatigue of the eyes and general exhaustion – the good monitor doesn’t harm your eyes. It means that employees shouldn’t interrupt work to take a little rest.
Bigger prestige of the company is another argument – outdated and bad computer monitors don’t add elegance and a nice appearance to a workplace in the opinion of both employees and clients. If the company wants it to be considered modern, it has to have modern high-quality devices.
Office work means not only replies to messages or drawing of accounts, but also graphic and multimedia actions, creation of the presentations, graphic materials, processing of multimedia, and many other actions which are difficult for executing on the monitor of an improper level.
How to choose a good monitor for the office?
The monitor for office computers has to correspond to certain criteria. Everything depends on the type of work performed, but let’s concentrate on the main actions: processing of spreadsheets, reading documents, use of the browser, performance of calculations.
To choose a good monitor for the office, it is worth paying attention to the following:
- Resolution is one of the parameters to which it is necessary to pay attention at the beginning. You can buy monitors with lower resolution, but it is better not to use models with lower resolution than HD+ (1600×900 pixels), and today the best decision is monitors with a resolution of not less than Full HD (1920×1080 pixels). If the monitor is intended for design and modern multimedia, it is better to choose a model with a higher resolution.
- The monitor size – we mean screen diagonal – should also be paid attention to. For office use monitors from 22 to 24 inches are often chosen. Big monitors will also work well with graphics and multimedia. It is worth paying attention to the ratio of the sides of the screen. Still, screens 4:3 which aren’t recommended for office work can be noticed in some offices. The optimum choice is 16:9 or 16:10.
- Matrix type. It is worth paying attention both to the type of a matrix and to its covering. Monitors with matrices of TN and IPS types are widespread nowadays. TN solutions are cheap and have a rather short time of reaction. However, they badly reproduce colors, and don’t display deep black color. IPS matrix, on the other hand, very well reproduces colors, shows the deep black color, and intensive contrasts are characterized by wide viewing angles. Unfortunately, the disadvantage of the latter is quite a high price, but the market is so diverse that it is possible to find a cheap IPS model. There are also available monitors with a matrix of VA or LED, but they aren’t so popular for office work.
- The monitor screen covering is another thing that must be considered. It can prevent light reflections that worsen display and strain eyes. Glossy matrixes are recommended for multimedia, but not for long work in front of the monitor.
- The frequency of updating indicates whether the chosen monitor is capable of providing comfortable conditions during the long work. The higher updating frequency, the less your eyes suffer.
- A brand is another thing to pay attention to. A good reputation of the company and positive reviews of users is one more factor that should be considered upon purchase of the monitor for office. It is worth choosing the equipment of the well-known and reputable brands which enjoy consumer confidence.
The post Choosing a monitor appeared first on thegreatillusion.com.
]]>The post Why Accurate Monitor Calibration is Necessary appeared first on thegreatillusion.com.
]]>Why is it necessary to calibrate a screen?
Starting from the generality that all screens are different (models, brands, components, prices, and many other things …), we understand better why they are likely not to display the same thing. I’m talking about quantity (color space) and color rendering.
Knowing how to calibrate the colors of your screen allows you to be serene when retouching and not to have any nasty surprises when printing your images. You spend a lot of time processing your images because you want a perfect result. It would be a shame to see a difference in color when the printer comes out. This printer may be yours or that of your officemate. The result would be the same since the file was retouched on a screen potentially showing a color display defect.
Calibration is a quasi-compulsory step to guard against this inconvenience. I will nuance this last sentence because some monitors are very well calibrated out of the factory today. The technological advances of the last screens (2-3 years) in calibration/ quality of the slab are a godsend and an opportunity for all photographers.
The interest of the process is to correct all the display imperfections (dominant and color range) of your screen. Under these conditions, the print of your shots will in principle be identical to the colors you view on the screen.
Don’t make the mistake of manually correcting the different color channels (red, green, blue). Your approximate and incomplete settings (based solely on your own vision) are only for one image and will be totally inadequate for another shot.
It should be noted that the human eye is unable to know the level of brightness of a screen as well as to read a color L-a-b (color space also called gamut) without any element of comparison.
The Monitor
A monitor, whether fixed or portable, offers a brightness setting. The screen works on the backlight to display all the visuals in your workstation. Most fixed displays have physical buttons with a menu of settings (contrast, brightness, colors…). Laptop screens have the same settings, but this time in-house, you can change them electronically.
A screen that is not properly calibrated and/or whose screen viewing gap from the print is known and managed by you can be quite satisfying in preparing your future prints.
Generally, brightness menus describe a percentage scale ranging from 0 to 100, with 0 being the minimum brightness of the screen backlight and 100 the maximum value.
Warning: Screens often come with a default setting of brightness far too high to prepare photographic prints!
While this high brightness highlights the display of your image on the screen in order to obtain a flattering rendering, the amount of light is not suitable to prepare photo prints that will be viewed in much less bright light. Do not hesitate to reduce the brightness from -30% to -50% compared to the factory setting.
In summary:
- It is imperative to avoid modules that automatically manage/adapt the brightness of your display.
- So you can judge your images seamlessly from one day to the next, choose brightness, and don’t change it.
- Beware of the overly flattering rendering of your monitor impossible to reproduce on a print:
- Avoid exceeding 50-60% of the brightness scale.
- Stay between 30 and 50% brightness for your display.
- The notion of brightness among manufacturers technically corresponds to the luminance value. This is expressed in candela per m2 (cd/m2).
- An acceptable luminance for image management and comparison should be between 80 and 160 cd/m2. You’ll find two types of standard-setting accessible for brightness: electronic (directly on the display (hardware setting) and computer (by the computer’s operating system (OS) or by the graphics card software).
You will find on the web a lot of information about monitor calibration, you will find below our recommendations.
For photographic use of your monitor, prefer the following settings:
- sRVB, D50 (5,000 K)
- Gamma 2.2
- 80 CD/m2
- International Standard (ISO 3664:2009).
You can also choose to place yourself in the same configurations as the PICTO facilities that were established after testing in a production situation. These are the following settings:
- 5,300K
- Gamma 2.2
- 120 CD/m2
Remember to name your profile with the date of creation and the parameters used to create this profile.
Don’t hesitate to make test prints to make sure your monitor color matches your printer output.
Some common examples of the discrepancies between screen and print:
- If your monitor is set to a brightness of 160 cd/m2 (too bright), the prints received will seem too dense.
- If your monitor is set at a 6500K color temperature, the prints received will seem too yellow (too hot).
- If your lighting to look at the prints is at a 6500K color temperature, the prints received will seem too blue (too cold).
- If your lighting to look at the prints is 500lx (standard home/office lighting), the prints received will seem too dense.
These discrepancies need to be corrected by you, we do not change your images.
Other displays that need accurate monitor calibration
Calibration is not only limited to computer monitors and home televisions but also to a wide variety of products and industries. The following are some.
- Vehicles, especially electric cars. The latest models of electric cars have wide screens and monitors that display the car parameters and driving conditions. Accurate monitor calibration in cars is different because it is not the colors that are being calibrated but the data. Some of these include but are not limited to speed, temperature, oil and fuel, rear and front videos, and a lot more parameters. The beauty of these electric car dashboards and monitors is just one reason why people are switching to electric cars.
- Industrial machinery. Industrial pieces of machinery have monitors too that need to be calibrated. In fact, like that of electric cars, calibrating these monitors are more complex than we can imagine.
As a last note, all things of any type that has a screen and displays something needs to be calibrated. Whether it’s a phone, office, pc, or monitor of a CNC lathe machine, both colors and data need to be accurate.
The post Why Accurate Monitor Calibration is Necessary appeared first on thegreatillusion.com.
]]>The post How to Perform an Accurate Monitor Calibration appeared first on thegreatillusion.com.
]]>PC screens are not always calibrated by default in the factory. By accurately calibrating your PC screen, you make sure it displays hues that are true to reality. So you won’t be surprised if a deep blue sky in a panoramic photo suddenly takes on a bland light blue hue on your PC screen. Use your PC’s software to calibrate your screen. I explain step by step how to calibrate the total appearance of your PC screen.
After purchasing a professional screen that can display close to natural colors, users must learn how to accurately calibrate the hue, contrast, brightness, and other settings of their display device. This step is necessary because, over time, the brightness of the monitor decreases, and the appearance they display tend to distort. This should not be taken lightly: if the problem is not corrected, it can have a negative impact on the accuracy and quality of photos and retouched images. Here is some useful information we want to share with you about monitor calibration, so you can get as accurate and consistent an appearance as possible with your device.
The following things must be understood before performing calibration.
How to display even colors across multiple devices
In a perfect world, the appearance of a photo should be rendered consistently, regardless of the device used to display (e.g., LED screens, mobile devices, etc.). Unfortunately, this is not the case. The hues of the same image may seem completely different depending on whether you’re looking at them on your personal computer monitor, desktop, or mobile devices, which is a real headache for many graphic artists and photographers. To deal with this issue, color management is the best solution. But how does this management work? In short, it is a conversion process with the goal to make the colors displayed on the different devices “as close as possible.” If different digital devices do not display exactly the same hues, this may be due to two reasons: (1.) the first is that devices often use different modes, and, (2.) is that small differences between the components used in mass production influence how each model reproduces colors. How do you solve this type of problem? To do this, we need a standard color space that acts as an exchange platform allowing two devices to properly convert different spaces and color range so that both devices display a similar appearance as close as possible.
How does color management work
In general, color management is a process that must be done from start to finish, from capturing an image to printing it. Graphic artists must not only assign the same hue (such as Adobe RGB) to their camera, editing software, and printer, but they must also calibrate the display settings of each device they work with. Thanks to this, they can ensure that the apperance of the photos they edit or send are as accurate as possible. Screens, printers, scanners, and other devices all need to have a unique ICC profile (International Colour Chart). For example, the ICC profile of a photographer’s work screen is created once that monitor has been calibrated using calibrator software. After retouching an image using post-production software, the ICC profile must be incorporated into the image when it is saved so that the colors are as accurate as possible when printed or displayed on other screens.
Of course, following the steps described above is not enough to ensure accurate visual representation. Photo editing software (such as Adobe Photoshop/Lightroom) must also use the right color space to get the best accuracy.
What is a 3D LUT?
Before explaining what a 3D LUT is, let’s first find out what LUT means. LUT is an acronym for “Look-Up Table.” Its main function is to interpret the color signal sent by the computer, then find the corresponding output value in the search table and, finally, display the result on the monitor.
As you probably know, an image is composed of a multitude of dots (pixels) and each pixel contains information (the number of bits). With screens, the LUT performs the function of an index. The corresponding values are found in the LUT and then displayed. The advantage of the LUT is that it allows hues to be displayed more efficiently. The biggest difference between a 3D LUT and a conventional 1D LUT is that it identifies the corresponding values (R, G, and B) in three one-dimensional search tables R, G, and B, while with a 3D LUT, the corresponding values come from a three-dimensional chart. The main advantage of the 3D LUT is that it can display colors with greater accuracy.
What is the difference between calibrating hardware and software colors?
The calibration of a monitor is generally divided into two categories: “software” calibration and “hardware” calibration. Regardless of the calibration method used, software, or hardware, the calibration of a monitor requires the use of a colorimeter or spectrophotometer. The main difference between the two calibration methods is that software calibration requires calibration software (such as i1Profiler) and a calibrator to adjust the graphics card’s display settings, which can easily cause a discontinuity in visual transition.
For hardware calibration, a calibrator is also used, but this time with the calibration software developed by the monitor manufacturer to calibrate this screen. The calibration data is recorded directly in the screen’s 3D LUT. Its main strength is to be able to display more accurately while maintaining the highest depth of hue that the screen can display, allowing for homogeneous color gradations without discontinuity.
How to actually calibrate your monitor
In general, the steps to calibrate the monitor are:
- Turn on the monitor for a period of time to warm up (approximately 30 minutes).
- Open the color management software and colorimeter or spectrophotometer, and follow the instructions from the software to perform calibration.
- After completing all the calibration steps, the color management software will analyze the measured data and save related information in the LUT of the monitor, and save the related ICC file in the system OS.
- Afterward, every time the system turns on, it will automatically apply the ICC profile to match the LUT output of the monitor.
The post How to Perform an Accurate Monitor Calibration appeared first on thegreatillusion.com.
]]>The post Camera calibration with a “color passport” from X-RIT appeared first on thegreatillusion.com.
]]>If you want your entire workflow to be color-accurate, then you need to start by creating an image, and therefore a color profile for your camera. This is probably overkill in most cases, but if you want to reproduce colors that are as close to real life as possible, then you should shoot in RAW format and use custom color profiles.
This is usually very difficult, but the new standards used to calibrate the camera make the procedure much easier. One such product is X-Rite’s ColorChecker Passport. This affordable tool contains two components: a reference calibration standard containing standardized colored squares on a plastic card and a very smart program that finds this calibration card in any image and uses known standard colors to create a profile specifically for a given camera, lens, and lighting conditions.
The program comes in two forms: as a standalone application and as a plug-in to the Adobe’s Lightroom RAW converter. In order to use the standalone program, you need to shoot RAW files in DNG format. Adobe’s DNG converter can convert your RAW files to it. The Lightroom plug-in works with all RAW files supported by Adobe Camera Raw.
The post Camera calibration with a “color passport” from X-RIT appeared first on thegreatillusion.com.
]]>